Chicken Bacon Ranch Pasta – because bacon makes everything better

Standard

IMG_8046

I saw this recipe on Pinterest and thought it sounded good. We tried it one night, not quite sure what to expect. All I have to say is…Wow! It was soooo yummy!

Chicken Bacon Ranch Pasta

Ingredients:

8 ounces penne pasta
1 Tablespoon butter
1 Tbsp flour
2 Tbsp dry ranch dressing seasoning mix
2 cups milk
1 cup shredded cheddar cheese
1/3 cup cooked, chopped bacon
2 cups cooked chopped chicken

Directions:

In a large pot, cook pasta according to package directions. Drain and set aside.

In same pot melt butter. Add flour and stir. Cook flour for 1 minute. Slowly whisk in milk. Continue cooking until sauce thickens. Stir in ranch dressing mix and cheese. Stir until cheese melts. Add chicken, bacon and pasta. Stir to coat.

Short Version:

Heat up some pre-cooked chicken… IMG_8045

Cook some bacon…  IMG_8041

Boil some pasta of your choice… IMG_8040

Make the sauce… IMG_8044

Mix it all together in a bowl and chow down!

IMG_8047

If you like all the ingredients in the name of this dish, you must try it! It is simply amazing!

Nailed it!!

Easy Garlic Chicken – Only 4 Ingredients!

Standard

IMG_7917

I found this recipe on Pinterest, tried it, and thought I would share. It’s quick, simple, and yummy!

Ingredients:

  • 4 boneless skinless  chicken breasts
  • 4 garlic cloves ,  minced
  • 4 tablespoons brown sugar
  • 3 teaspoonsolive oil

Directions:

Preheat oven to 500°F and lightly grease a casserole dish.
  • In small sauté pan, sauté garlic with the oil until tender.
  • Remove from heat and stir in brown sugar.
  • Place chicken breasts in a prepared baking dish and cover with  the garlic and brown sugar mixture.
  • Add salt and pepper to taste.
  • Bake uncovered for 15-30  minutes.

This is what the sauce looks like before you put it on the chicken. Kind of goopy and sticky.

IMG_7897

And here it is after spread on the chicken.

IMG_7898

Here’s a link to the site I found it on: http://goodrecipesonline.com/easy-garlic-chicken/

Give it a try on a night that you don’t have much time to fix something. Enjoy! I’m sure we will be fixing it again soon. Nailed it!


Pipecleaner Alphabet Letters

Image

pipecleanerletters

This week is review for our VPK kids, so I wanted a fun way for them to practice making thier letters. I decided to give them all 2 pipecleaners (3 if they said they needed another) and get them to make letters of the alphabet. They could make any letter they wanted, upper or lowercase. They were so proud after each letter they made and go to show me. They were even more proud because I told them I wanted to take a picture after they did it! Just telling them that I would take a picture of their work motivated them to try hard and to let me know when they got one done. I loved seeing the different ways they chose to make letters and how their creativity played out it in. It’s just a quick, easy, and fun way for them to practice. It could be used as a center or a time killer. Not only does it help them with forming their letters, but it also helps them with thier fine motor skills. And another perk…you can straighten them out and use them again! I’m sure they will be even more excited next time when I bring out more colors for them to use also!

Be My Valentine – another handprint card for kids

Standard

IMG_7860

This is another cute Valentine’s Day craft that I saw on Pinterest and did with my VPK class. It was very simple and turned out really cute I thought!

Supplies:

paint
marker
tissue paper
glue

Directions:

1. Paint both of the child’s hands.

2. Have them place their hands on the paper so that their hands form a heart like the one in the picture. As they are doing it, the heart will look like it is upsidedown. For my 4 year olds, I had to physically take their hands and put them down so that they made a heart.

3. Once it is dry, write a cute saying in the middle of the heart: Be Mine, Be My Valentine, LOVE, I Love You, etc.

4. Put glue around the outer edges of the paper and let them put little pieces of tissue paper all around their card. If you wish, cut off the extra pieces that are hanging off the edge. I cut the extra off mine, but I found that my kids used less paper than I did and it actually looked cuter when it was not trimmed.

This was an easy fun card for them to do for their parents, and something a little different than normal. I gave mine to my husband. 🙂

IMG_7473

Here is the link I found it on: http://rosinahuber.blogspot.com/2011/01/valentine-handprint-cards-one-for-you.html

Nailed it!!!

I Love You….This Much! – A Valentine’s Day Craft for Kids

Standard

IMG_7861

This is a craft that I saw on Pinterest and did with my VPK class this Valentine’s Day. It would also work with Kindergarten, first, or second grade. The first and second graders would actually be able to do it completely themselves most likely.

Supplies:
2 colors of construction paper
scissors
markers
tape or glue

Directions:

1. Trace one of the child’s hands, or get them to trace each other’s hands if they are able.

2. Fold the paper in half and cut out the hand so that you have 2 hands.

3. Take the red construction paper and fold it like an acordian at least 10 times.

4. Draw a small heart on the paper after it is folded. Make sure the the sides of the heart actually go off the paper some.

5. Cut the heart out, BUT MAKE SURE that you leave a space on the left and right side of the heart! If you cut it too close together, then all the hearts will fall apart. If you make the mistake, you will see what you did wrong and most likely be able to correct it on your next attempt. I was able to get about 8-10 strands of hearts out of one piece of paper. Also, since you will be cutting through many layers, the kids will most likely not be able to use kid’s scissors. For my VPK kids, I cut out the hearts and hands for them.

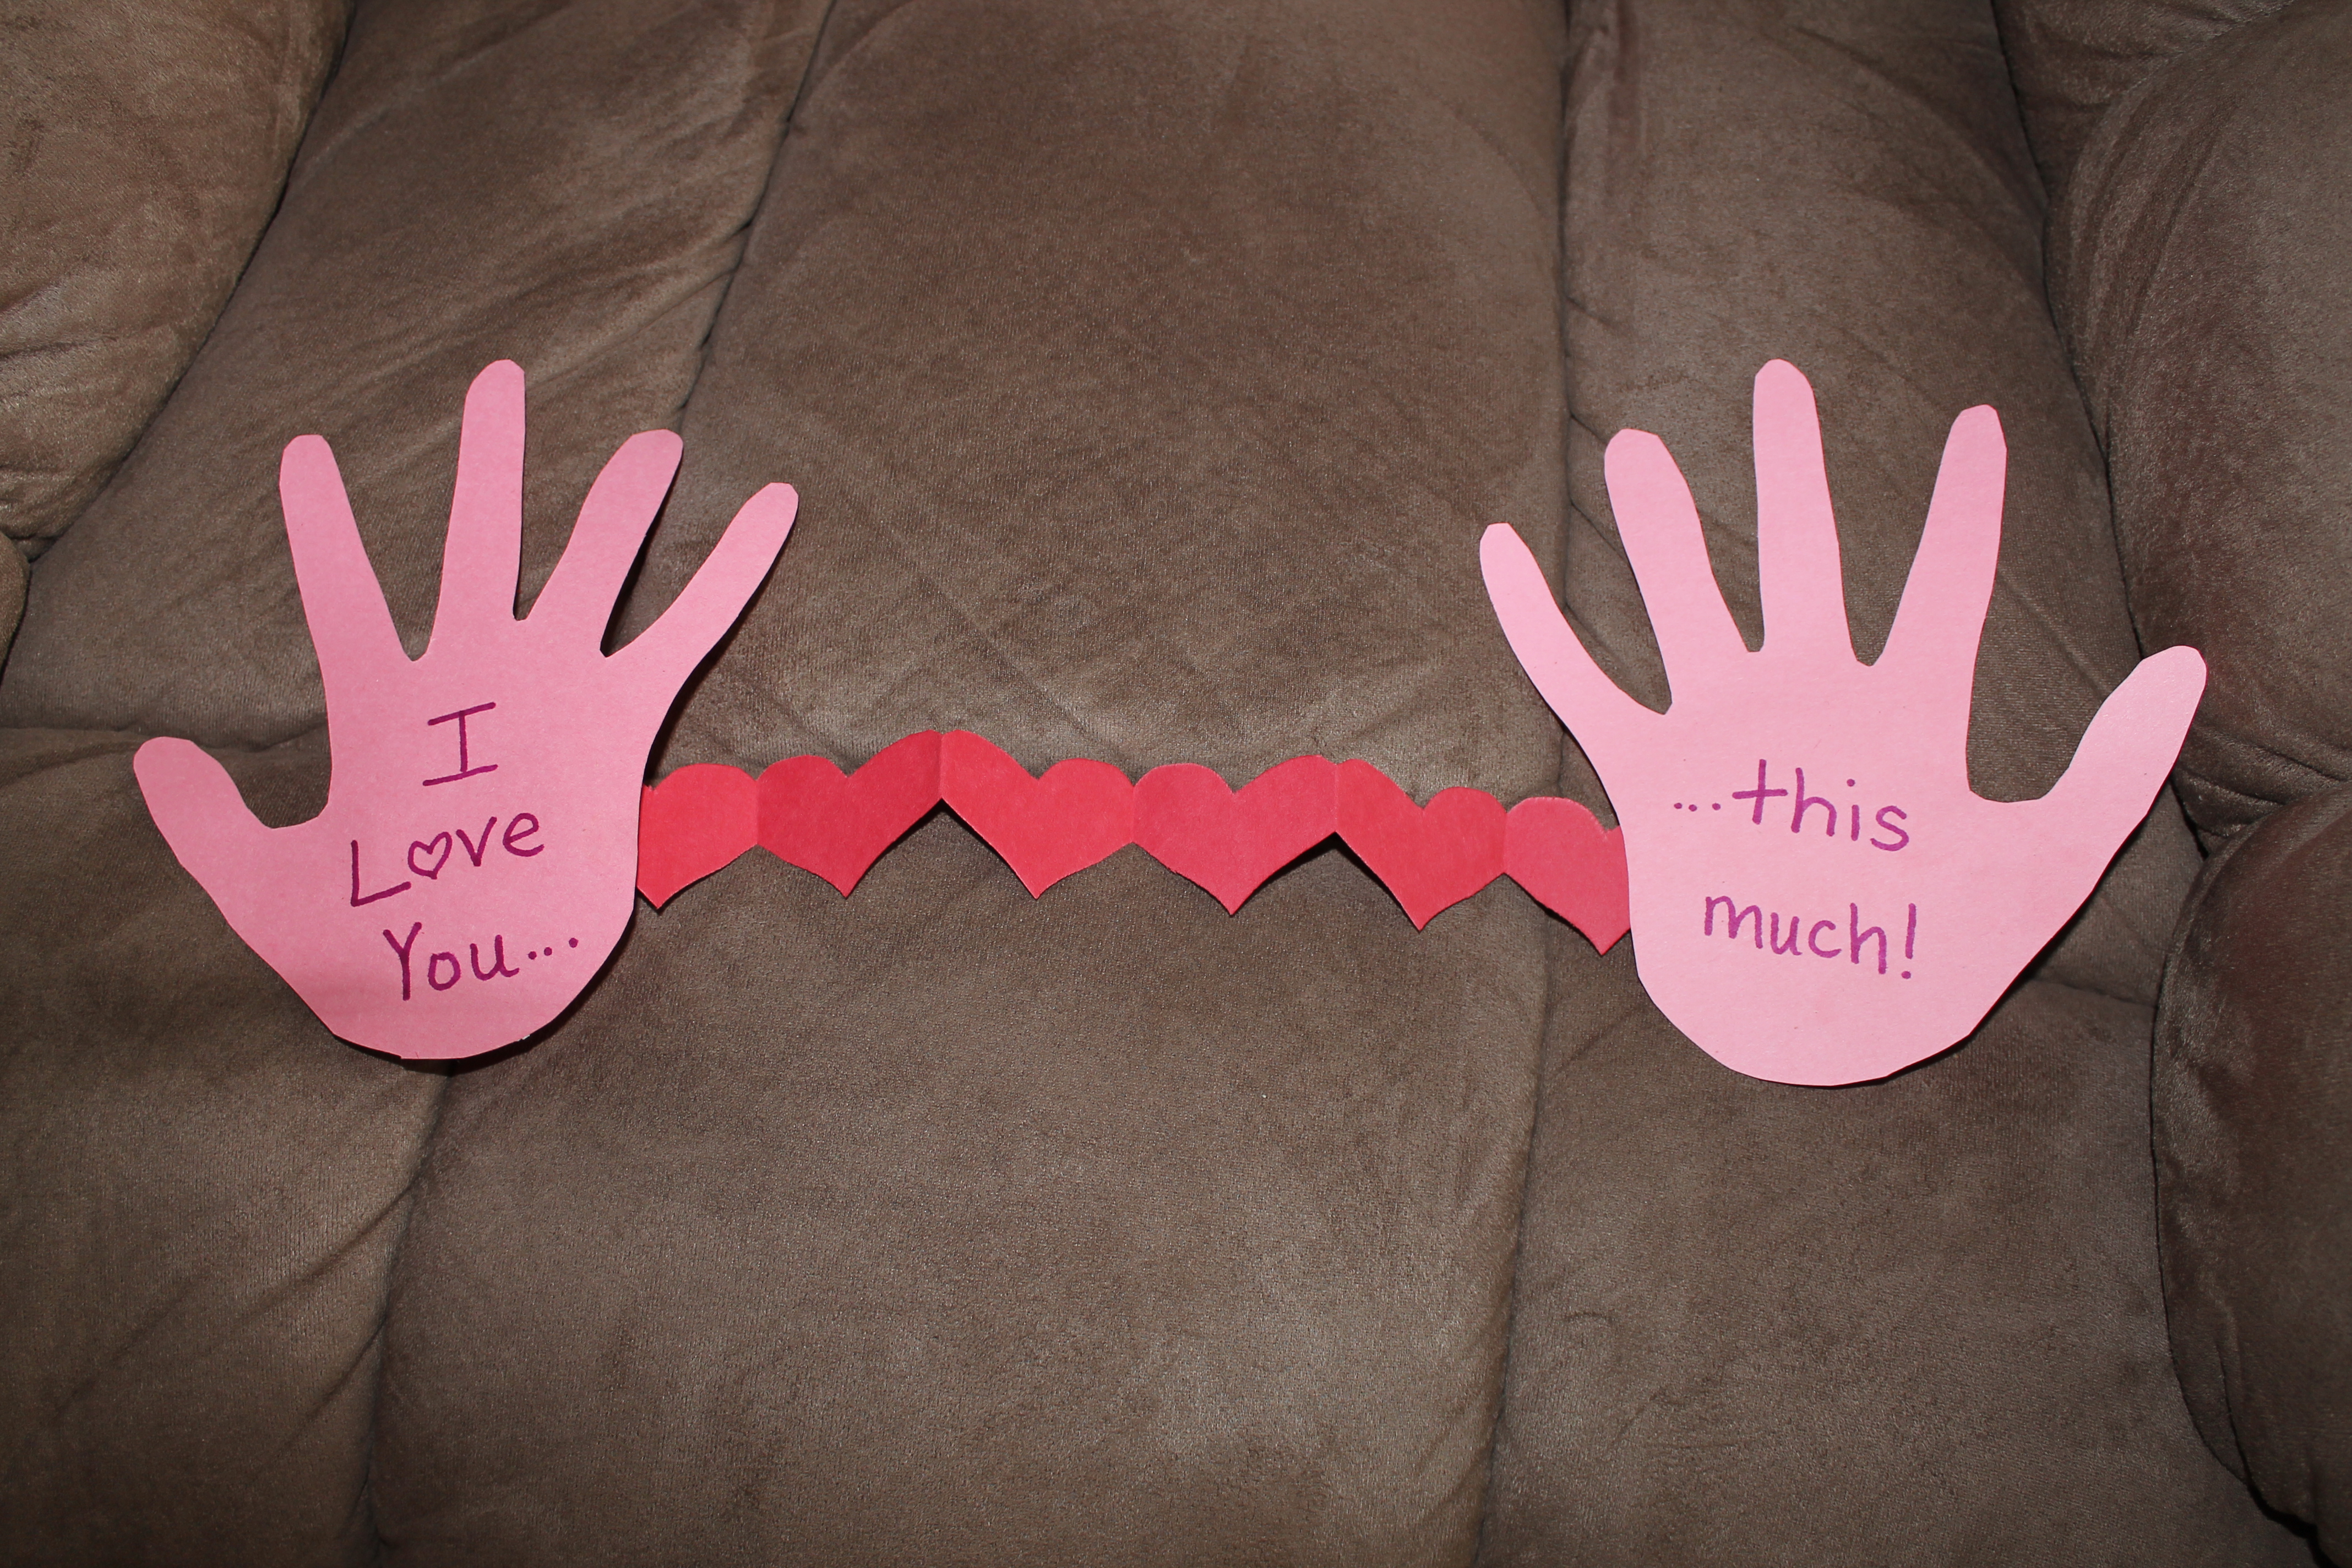
6. Get the kids to write “I Love You…” on one hand. Then get them to write “…this much!!!” on the opposite side of the other hand.

7. Tape or glue one side of the hearts to the back of one hand and the other side of the hearts to the back of the other hand.

IMG_7862

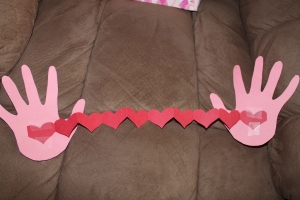
This is what it looks like from the inside.

IMG_7863

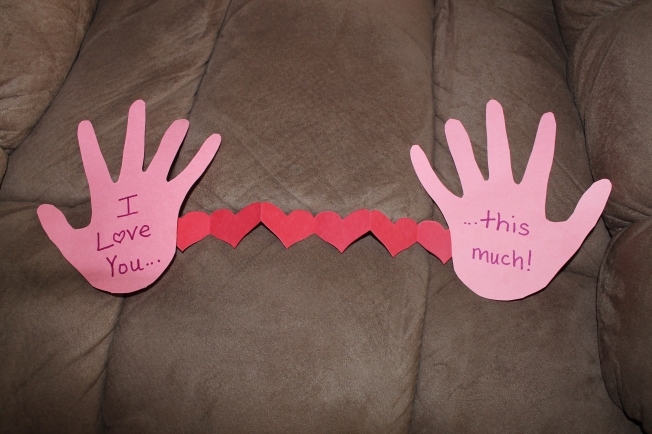
This is what it will look like from the front.

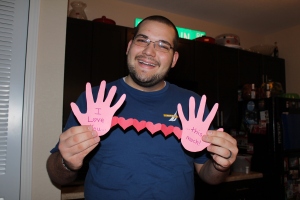
It is such a fun and cute craft for the kids to do for their parents or grandparents. And they love pulling it apart and putting it together again!

I gave mine to my hubby. 🙂

IMG_7474

Here is the link to the site where I saw it. They actually put the words “this much” on the accordian part and did not do hearts for the middle. Both ways are cute I think! And this site has other really great Valentine’s Day ideas that I will definitely be using in the future. Check it out! http://www.pbfingers.com/2013/02/08/budget-friendly-valentines-day-ideas/#

Nailed it!!!

Rice Krispy Treat Kissess

Image

IMG_7485

Since my last Valentine’s treat for my husband wasn’t his favorite, I decided to make something that I was 100% sure he would like. So I made him extra large rice krispy kisses! They were super easy to make and pretty fun too!

To make them, you just start off by making rice krispy treats like you normally would. If you don’t know how, then here are the quick directions.

Ingredients:

6 cups of rice krispies
1 bag of marshmallows
3 tablespoons of butter

Directions:

Put the marshmallows and butter in a bowl and heat it in the microwave for 2 mintues. Stir it and then heat it for 1 more minute. Make sure that you spray your spoon with Pam before you stir, or else they will stick to the spoon really bad. Then mix in the rice krispies and stir it all together. Next comes the fun part!

In order to make them look like kisses, you are going to put the mix into funnels. Once again, make sure that the funnels are sprayed with Pam very well, or else will be a pain to get them out! In order to get it down in there good, I just sprayed my hands with Pam and then pushed the rice krispy mix down into the funnel. I had 3 different sizes of funnels that I used. Then I just put the extra in a pan to eat.

IMG_7865

Once they are done cooling, then you can take them out of the funnel and wrap them in foil. I also molded mine a little to make them look a little more like kisses. Then you can write or type out a short line to your honey and put it on a strip of paper to stick out the top of the kiss. To wrap mine, I set the kiss flat on the foil and then just started folding it upwards. Once I got towards the top, I started twisting it and tore off extra pieces of foil where I needed to. Then when that special someone opens it, they will find a sweet treat inside!

IMG_7501

IMG_7495 IMG_7481 IMG_7867

Once again, this is another thing that I found on Pinterest. Here is the link from where I pinned it: http://www.bargainblessings.com/frugal-valentines-day-ideas-round-up/

My husband loved his special kisses! Nailed it!!!


Strawberry Valentine Oreo Cookies

Standard

IMG_7452These are some cookies that I made for my hubby for Valentine’s Day. They were really easy to make and very tasty! They were a big hit with my church friends and co-workers…not so much with my husband. I didn’t realize how much cream cheese they had in them until I had already started, and he doesn’t like cream cheese. But even so, he still ate one and said that it would’ve been great with regular cake icing inbetween. Those who like cream cheese, you will love these cookies! Here is the recipe and the link to where I got the idea.

Strawberry Valentine Oreo Cookies:

Ingredients:
Cookies:
1 package of strawberry cake mix
2 eggs
3/4 cup of shortening

Frosting:
8 oz. cream cheese, room temperature
1/2 stick of butter, softened
2 tsp. vanilla
4 c. powdered sugar

Instructions:
Preheat oven to 350 degrees.

Mix together strawberry cake mix, eggs and shortening until well combined. The dough will be pretty thick. Roll dough into balls, making sure they are all similar in size. Place dough onto ungreased cookie sheet and bake for 8 minutes. Immediately transfer cookies to a cooking rack.

Mix together cream cheese, butter, vanilla and powdered sugar until smooth. Spread onto cooled cookies and sandwich together.

*Makes 12-15 cookies after they are sandwiched together

http://www.sixsistersstuff.com/2012/02/strawberry-valentine-oreo-cookies.html

I also think these would be wonderful using a red velvet cake mix instead of strawberry. You could do both and have red and pink cookies for Valentine’s Day!

Here are some pictures of the baking process.

IMG_7449

Here are the cookies.

IMG_7448

This is the filling.

IMG_7450

And here is the finished product! Nailed it!!!

Happy baking!

A craft for my spoiled puppy

Standard

IMG_7369My beloved puppy, Allie Belle, got so many clothes this Christmas that I decided she needed a clothes rack. So this is what I came up with. It’s just something special for her and it makes it easier to get to all of her clothes, harnesses, leashes, etc. It is hanging in her “room” above her doggy bed and beside the crates with her toys and treats.

IMG_7437

To make this I used a wooden plaque from Michael’s, cabinet knobs from Wal-Mart (they came in packs of 2), cups, and paint. And a friend of mine gave me hangers that she no longer needed for her baby.

First I painted the edges of the wood the different colors. Then I painted the whole top pink. I only did 2 coats of that. Then I got 3 different sizes of cups and traced random circles. Next, I painted the circles different colors and kept reapplying new coats of paint once they dried. It took quite a few coats to cover up the pink underneath. I looked online for the font that I wanted to use for her name and then I practiced it a lot on paper first. Then I painted her name on there with 2 coats of purple. That completed all of the wood painting. Then I used a sponge to paint all the knobs. I did 2 coats on those as well. Then I painted the letters on them. Next I set them on there where I wanted them and then got out my measuring tape to make sure that they were all even. That’s when my husband came in the picture. I put marks where I wanted the holes, then he drilled holes in there for me and screwed the knobs in. I could’ve done it myself, it was just much easier to have him do it! Then all I had to do was put alligator hangers on the back to hang it on the wall. Then I decked it out with all of Allie’s clothes.

I am a firm believer in spoiling pets, and I was thrilled to be able to make something special for my Allie! As soon as I hung her clothes on it, she started jumping up at it and now she goes straight there when I mention putting clothes on her or taking her for a walk. It took a while to make with all the coats of paint, but I am very pleased with the way it turned out. And it was nice to be able to say I came up with an idea myself and I didn’t find it on Pinterest!